


Hey there 🙂
My name is Laura Hofberger, and I’m currently kayaking in Chile!
Chile is a paradise for whitewater kayaking, but due to the Coronavirus pandemic, it’s not the easiest country to travel to. If you’re still planning to come to Chile, I wanted to share my insights with you.
First, you have to be vaccinated to enter the country, and you have to verify your vaccination in advance with the Chilean Ministry of Health to get your mobility pass (pase de movilidad). To do that, register here and upload the QR-Code and certificate from your vaccination.
After that, you have to wait for the approval of the Ministry of Health. With my vaccination it took about three weeks, but if you’re lucky it might only be one or two weeks. Don’t go to Chile without approval, though! I know of some Americans who were sent straight back because of a problem with their mobility pass.
You can check on the status of your mobility pass on the website, and you get an email if something is missing or if it’s approved.
If your vaccination is approved, you can fly to Chile, but there’s more to do:
• 72 hours before your flight to Chile, you have to do a PCR test. Keep in mind that the 72 hours don’t count from your home airport but from the airport you fly direct to Santiago from. For example, if you’re flying from London to Atlanta and then from Atlanta to Santiago, the takeoff time from Atlanta will be the reference time for your PCR test.
• 48 hours before entering the country, you have to register at www.c19.cl (this link will be in your vaccination approval email), where you’ll be asked to upload the result of your PCR test, a screenshot of your health insurance (it has to cover at least 30,000 US $, in case you get covid over there), and the address where you will fulfil your “quarantine“ until the result of your PCR test in Santiago has arrived. If it’s approved, you should get an email with a QR-Code in it which you need on your arrival.
• When you arrive at the airport, you have to go through the registration station first, where they check your mobility pass. This is where you need the QR-code mentioned previously. After that, you get to the PCR test. You can check your result online (make sure you approve pop-ups on your mobile device for that). Bionet will email you with your link. If you’re lucky, you can get your PCR test result directly at the airport after 4-6 hours (on the first floor on the right side of the elevator beside the exit). Without a negative PCR test result, you’re not allowed to enter public transport, but you can leave the airport in a cab to get to your quarantine address. If you plan to take a bus to Puerto Montt, you should allow some time to get your PCR test result in your planning. Ask the people from Bionet at the result counter how long it might take. There is a second PCR centre close to the airport, where I’ve heard you can get your result faster. If you’re in a hurry, it might be worth informing yourself about that in advance.
• Since the beginning of December, it is also possible to fly directly from Santiago to Temuco and take the PCR test there.
• If everything goes according to plan, you should get your mobility pass (best to take a screenshot of the QR code and your test result) and you can continue to travel. You’re not allowed to leave Santiago before your test result is confirmed negative. After that, you just have to do an online self-report for ten days at https://autoreportec19.cl. Here, you have to report if you have any symptoms, and after five days you’re able to change your address. Don’t worry, the website is in English 🙂 We haven’t checked out what happens if you miss a day of the self-report, so if you have reception just do it straight away, because there are a lot of places in Chile where the reception is just too low to load the homepage. The homepage also tells you when you don’t have to self-report any longer. So now you’re free to go 🙂
• If your PCR result at Santiago is positive, or one of your travel buddies is positive, you have to go to a “resitencia sanitaria“. The health ministry will get in touch with you and pick you up at your quarantine address (or the airport) and transport you there. If you’re positive, you have to stay there for ten days; if you’ve been in contact with someone who is positive, but you are negative, they let you go after seven days (if you’re symptom-free the whole time). These “Corona hotels“ are free, you’ll get food four times a day, and they have doctors there checking your vitals two to four times a day.
How do I know that? Well, one of our travel group had a positive PCR result in Santiago, so I had to spend the first seven days of the trip in a Corona hotel. Not the best start, but afterwards we went straight to the Rio Claro and everything was forgotten 🙂
Since the Covid situation is not a stable one, I would recommend always checking if the restrictions have changed or new rules have been sanctioned before travelling to Chile. I will be here hopefully until the end of January, so if you have any questions about the Covid situation, water levels, or anything else, feel free to contact me 🙂 (probably best via Instagram: @laura.hontas)
Once you’ve mastered all the entry hurdles and finished doing your ten days of self-reporting, travelling in Chile is really stress-free. I heard from some people that they just didn’t do the self-reporting and nothing happened, but if you have reception, it’s still probably better to be safe than sorry and just sacrifice two minutes a day for it.
Like in any other country, it’s mandatory to wear masks in public places like supermarkets and also in crowded areas in the cities, but since we’ve been dealing with the pandemic for quite some time, we’re probably all used to having a face mask in every pocket anyway!
Pase de Mobilidad
So, what do you need a mobility pass for? You don’t need it for renting a car or for cabs, but it is required for public transportation or for entering a restaurant. If you’re travelling south, you have to take some ferries and might need to show your mobility pass to board them. Better just take a screenshot of your mobility pass with the QR Code to avoid any complications.
Getting a Chilean SIM Card
If you want to get a Chilean SIM Card, I would recommend getting one from Entel. At the beginning, we had SIM cards from WOW and Claro, but the further south we got, the worse the reception got, so we switched to Entel on the recommendation of some Chilean friends. Getting a prepaid SIM card in Chile is really cheap, the SIM card costs about two euros and then you can get different “bolsas”. I paid less than ten euros for 10 GB + 500 minutes for 30 days and limitless use of most of the social media apps is included. If you’re staying longer than 30 days in Chile, you have to register your mobile phone at www.multibanda.net, otherwise, it will stop working. For the registration you need:
- A photo of your passport
- A photo of your flight ticket or a photo of the visa in your passport
- A screenshot of your IMEI (dial *#06# to get that)
- Brand and model of your phone
- Your Chilean mobile number
Paddling in National Parks
Some classic rivers in Chile are in national parks. If you have to enter the national park to paddle, you have to buy your ticket online at https://aspticket.cl. In the national parks we have been to, there was no option to buy the ticket at the entry most of the time, so it’s better to buy tickets in advance, as the reception in the parks is most often too low to buy them there.
At the Rio Claro, you only need the ticket for the Seven Sisters section, but when we were there the rangers told us that it is forbidden to paddle the section, so we just waited until the park was closed and all the rangers went home. No problem 🙂
The problem with the rangers happened at the Gol Gol and the Pedrohue as well. When we were waiting at the put-in of the Gol Gol for the shuttle, a group of rangers approached us and again told us that paddling was forbidden. We told them that we’d just wait for the shuttle to come back and then go. Of course, we didn’t do that. As soon as the rangers were gone, we grabbed all our gear and headed into the woods to wait out of sight for the rest of the group.
Once we got on the river, we didn’t see any more rangers, so everything went well. My recommendation for paddling the Gol Gol is to not linger at the car park but to head straight to the woods and wait there for the shuttle.
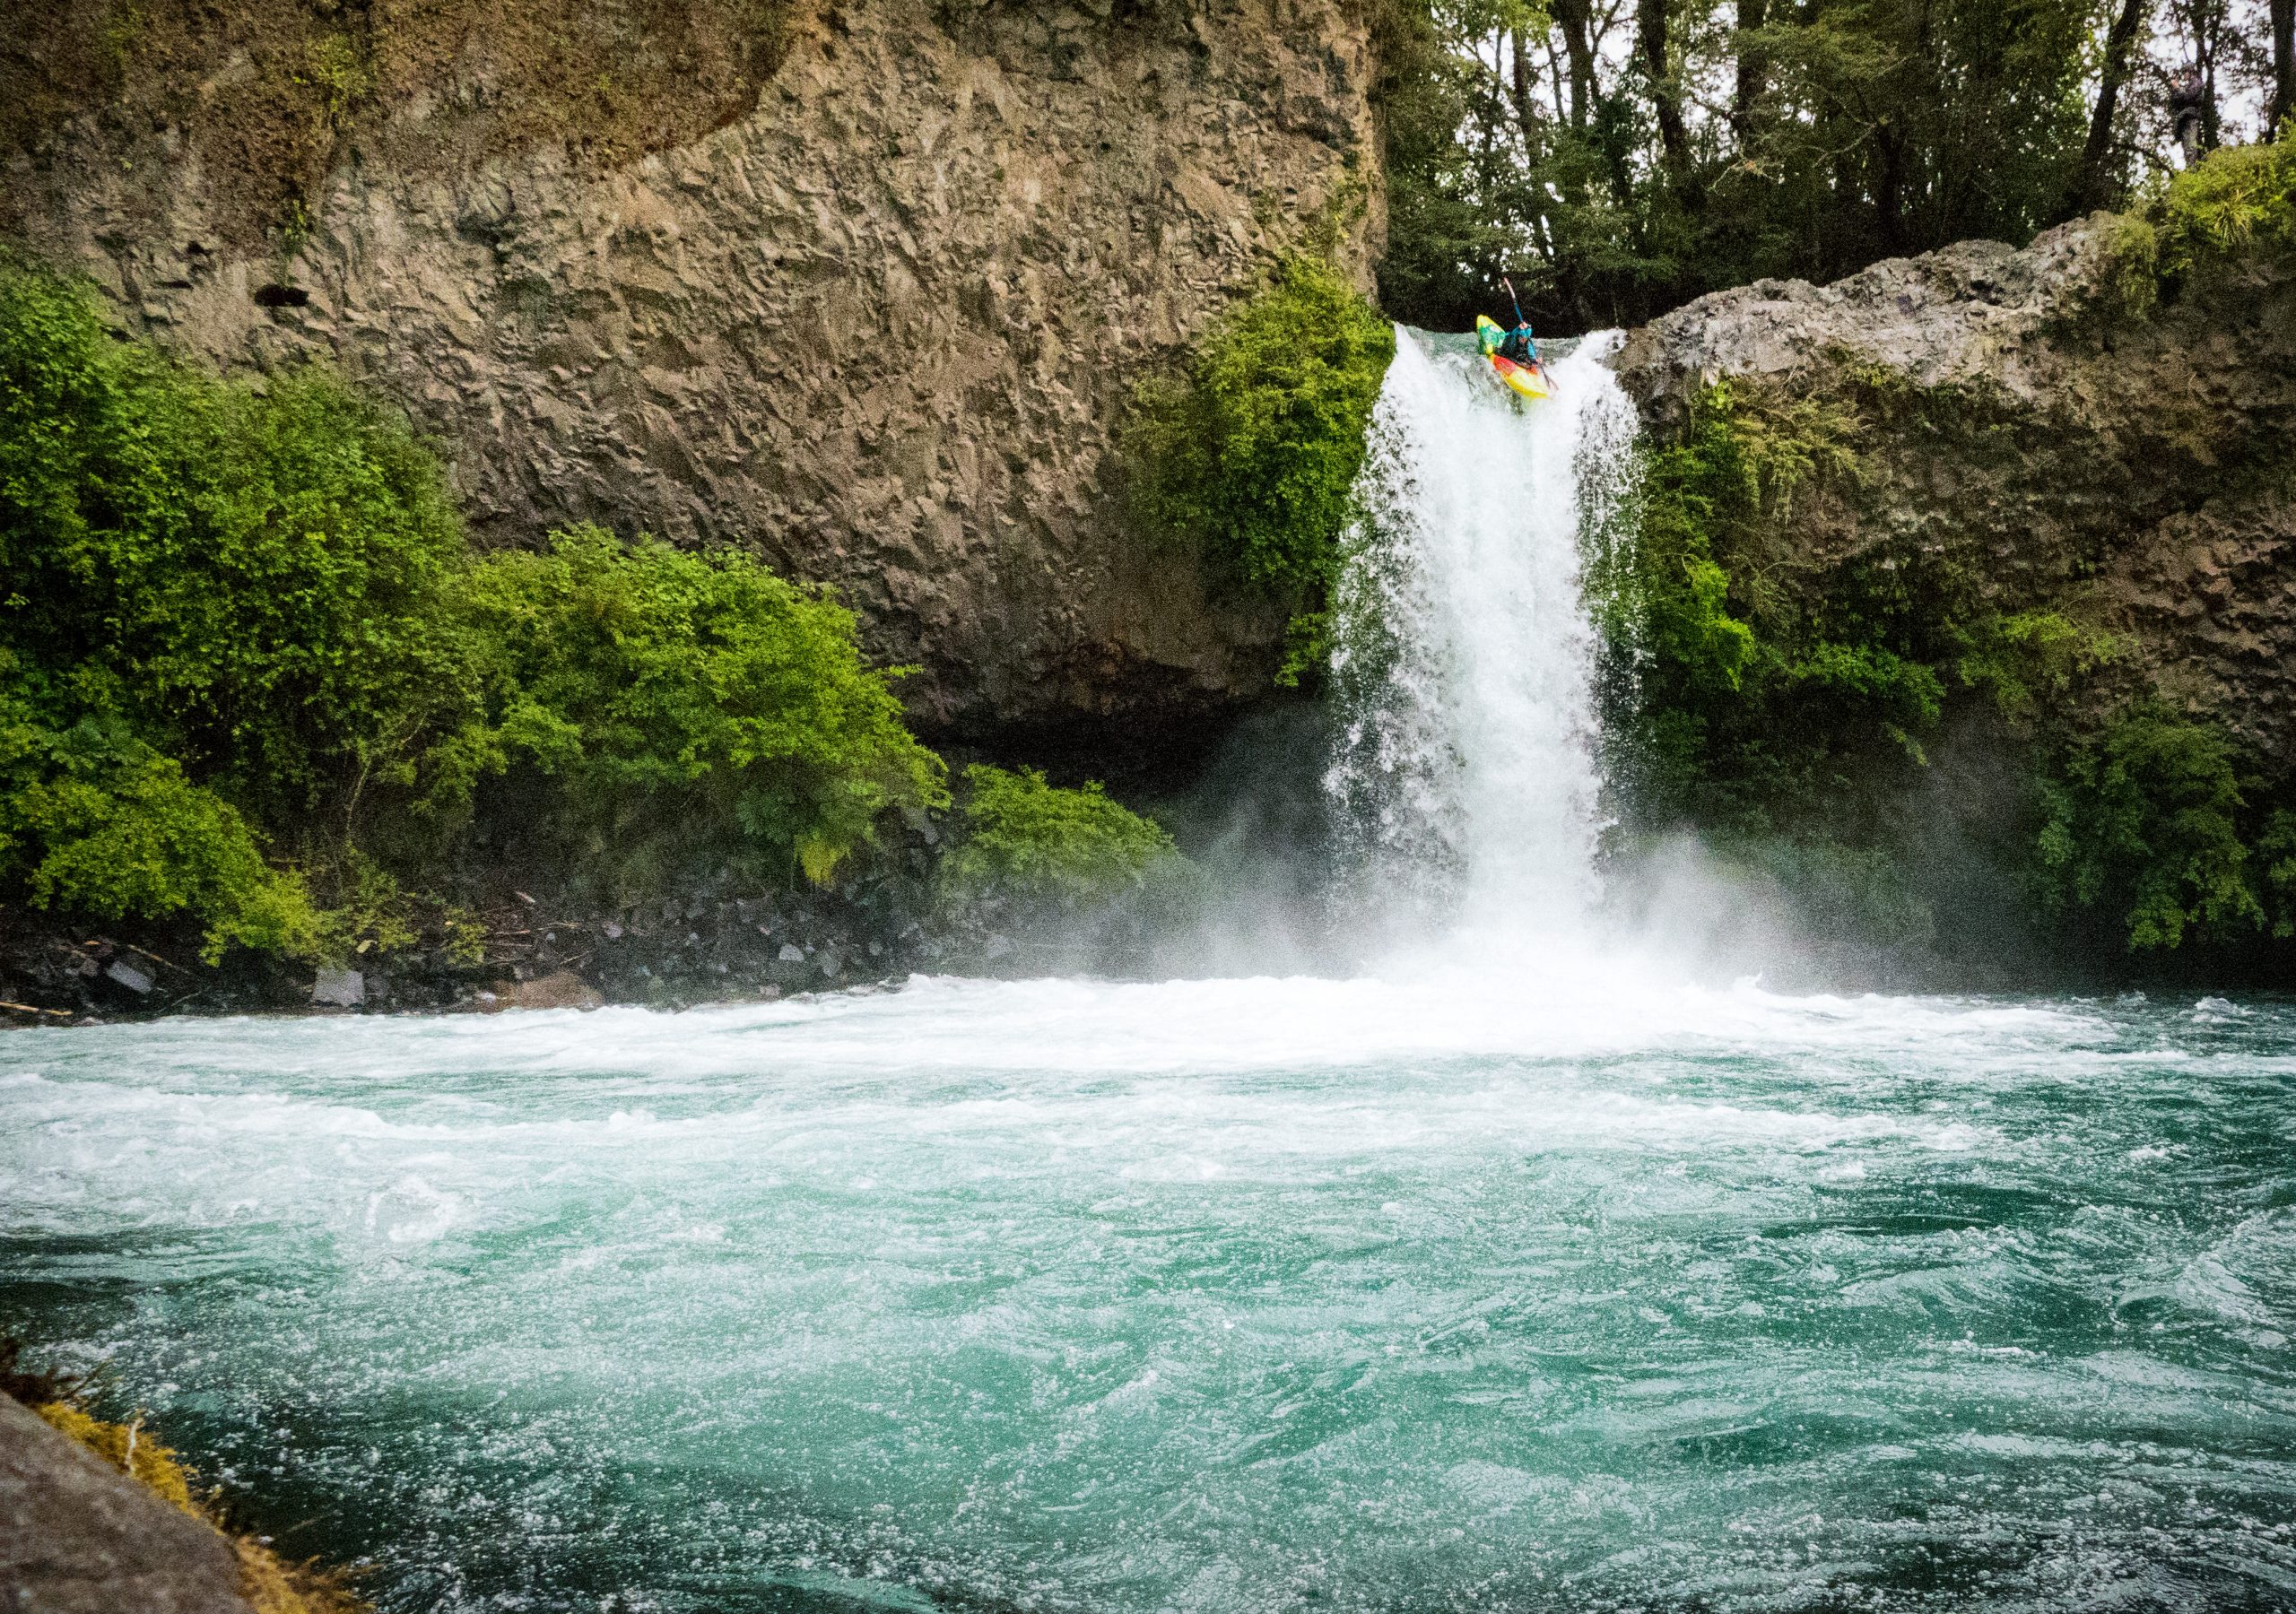
At the Petrohue we ran into even more trouble. In the morning, we entered the National Park (where we were actually able to buy the ticket at the entrance) to scout the waterfalls. We knew that the waterfalls were forbidden to paddle, so if you want to do it, it has to be either early in the morning or late in the evening (check the opening hours of the park in advance). Sadly, the water level of the falls was too low for paddling them.
Two of our group decided to paddle the part above the falls, but made the same mistake as on the Gol Gol and spent too much time at the put-in. Again, a ranger saw us and told us that it’s forbidden to paddle in the National Park. He even threatened to call the police. We took the threat lightly, and the two put in out of sight around the corner.
The problem was, the ranger actually did call the police. When they arrived, I tried to convince them that the others were paddling below the National Park, but they didn’t really buy the story and kept patrolling the river for quite some time. Luckily the guys on the river saw the blue light and hid in the underwood on the left shore since the only street in the valley is on river right.
They waited there for a while and after the National Park closed they started sneaking down the river. We picked them up and got the hell away from the park.
So my recommendation for paddling the Petrohue is putting in at around 18:30 and not fussing around at the put-in or take-out. In the evening you should be fine since the rangers only patrol during the opening hours of the park.
My Favourite Rivers So Far:
- Rio Puelo
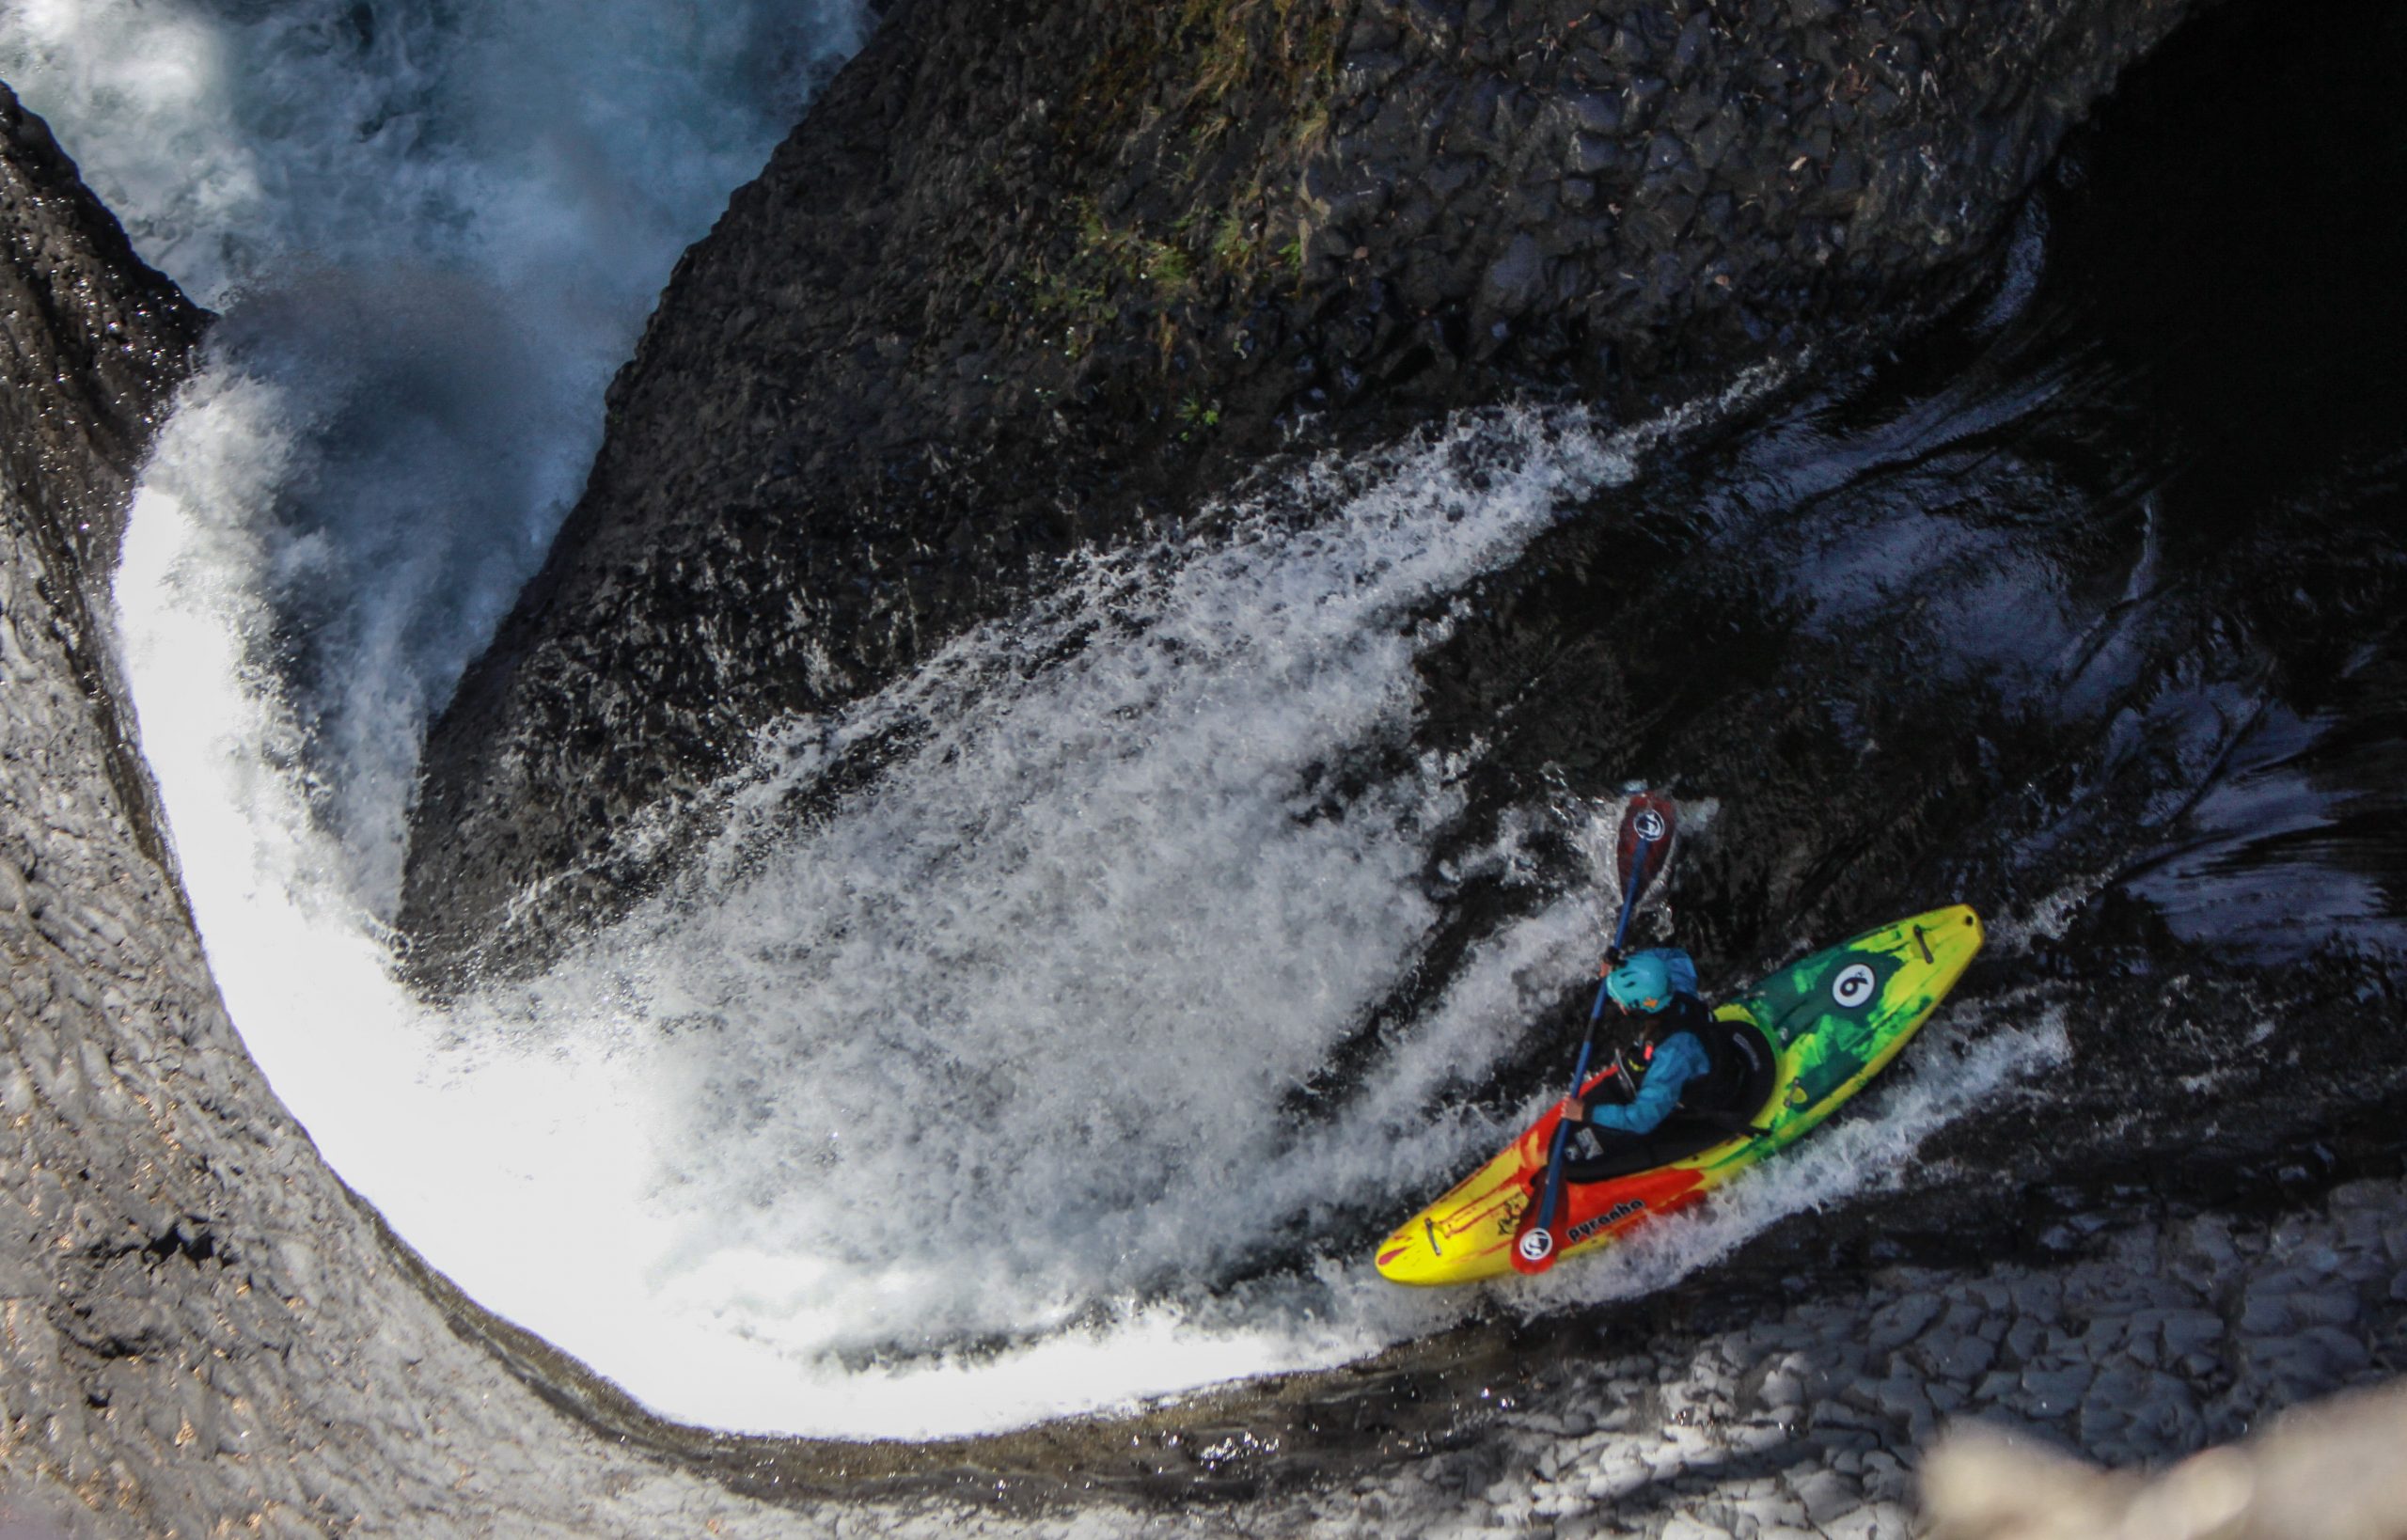
The Puelo was the first “big water” river on our trip. The upper canyon has around seven big rapids which are all scoutable (if you’re not feeling up for any of the rapids it’s also possible to portage them). The biggest rapid on the Puelo is called “The Portage” but at our water level, it was good to go. You can scout the whole rapid on the right side and also take nice pictures from there. What I liked a lot about the Puelo is that it’s big water, but you have to hit the lines, and the 9R is just the perfect boat for that since it’s fast and, for my body weight, very maneuvrable in big water!
- Rio Claro
Siete Tazas section is a nice quick evening run in an absolutely stunning canyon.
For the 22 Saltos section you have to hike up about 30 to 45 minutes, but it is totally worth it. You have delightful drops between one and six meters, the gorge is super beautiful, and there is a nice place to stay, the hostel Val Verde, directly at the take-out.
If you have enough water, you can paddle straight down from the 22 Saltos section until the End of the Garganta section. Although the water level was low, the Garganta canyon was definitely one of my highlights on this trip. If you have the chance of catching the Claro you won’t regret it!
- Rio Riñinahue
The Riñinahue is probably not as well known as the other rivers, but it’s a gem! You have four smaller drops in a really narrow gorge and then a bigger drop (about seven meters) at the exit of the gorge. You can put in directly above the first drop. I would recommend scouting the second and third drop since all the water pushes hard towards the left wall. Directly above the fourth drop, there is a huge cave on the left where you don’t want to end up. If you’re not feeling it and just want to paddle the big drop, you can jump into the pool beneath the fourth drop, but be careful; it’s about a 15 to 18 meter jump into green water!
- Rio Fuy
So far, I’ve only paddled the upper Fuy since the water level for the middle Fuy is still quite high, but I hope to catch the middle on the way back south at the end of the trip. The upper section is a lot of fun. You can warm up on the first few kilometres before reaching the La Leona drop (about four meters high). The drop is super beautiful, and you can easily carry up as often as you want. After La Leona, you have about 300 meters of awesome whitewater with two smaller drops. The last drop you can also easily carry up again as often as you like. The upper Fuy is just a fun, stress-free run to enjoy!
Hope to see some of you in Chile and have an amazing time on the river together!
Buenas lineas!
Laura